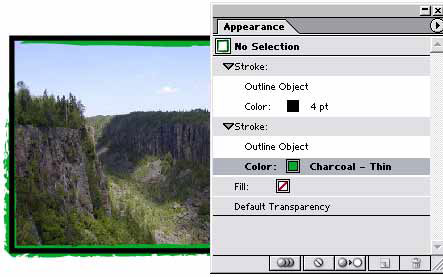
 Northlite Designs has a quick and informative tutorial on how to stroke a placed image in Adobe Illustrator. Don’t forget to check out their other tutorials.
Tagged: Illustrator
Creating your own distortion envelopes in Adobe Illustrator
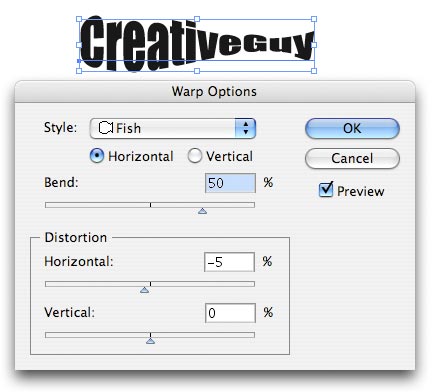
 Envelopes are what Adobe Illustrator calls the shapes you use to distort objects. If you don’t know what I’m talking about, go to the Effects>Warp menu when you have an object selected. You can create your own Envelopes and use them on virtually any object in Illustrator other than graphs or guides. Here’s how: Select one or more objects on your page. Now go to the Object>Envelope Distort menu and select a method for distortion from the menu. Once applied, you can continue to the edit the original object, and you can edit, expand or delete the Envelope at any time you desire. The only thing you can’t do is edit an Envelope shape and the object in the Envelope at the same time.
Creating compound paths in Illustrator
One of the most confusing things to do with Illustrator for new users is working with Compound Paths, which are responsible for taking two solid objects and combining them to make one of the objects a “hole” in the other. Let’s say you want to make a donut. You first draw a larger circle, then draw a second smaller circle over the first one which will be the hole. Now, simply select the objects and go to Object>Compound Path>Make. That’s it.
Creating “dirty type” in Illustrator
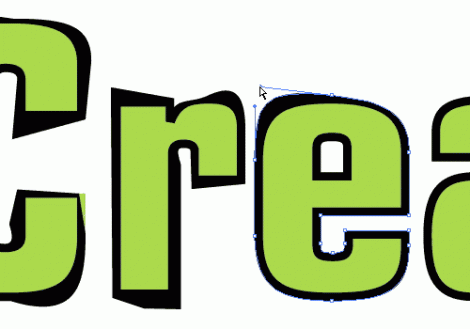
When you’re working in Illustrator and you want a little “rougher/hand-drawn look” to your type, try converting the type to outlines then convert your stroke to an outline as well.  First, make sure your type has a stroke applied. Then select your type with the Arrow tool, go to Type>Create Outlines (or Command + Shift + O). Then, go to Object>Path>Outline Stroke. This will essentially make the stroke of the type a different object completely. Now comes the fun part. Use the Direct Select tool (the white arrow tool) to select the stroke outlines and move them however you wish. You can achieve even better effects by grabbing the bezier handles and stretching them. For even more effect, you can go to Filter>Distort>Roughen and use very small amounts in the dialog input boxes to achieve greater “hand drawn” appearance.
Creating Symbols in Adobe Illustrator
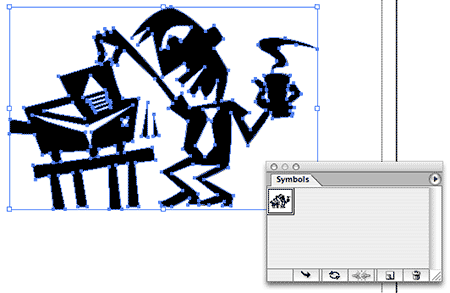
Symbols are simply stored objects created or placed in Adobe Illustrator that you can retrieve easily from the Symbol palette. This includes mesh objects, raster images, text, regular and compound paths or groups of objects. (You cannot, however, create a symbol from a linked piece of art or graphs)  To create a symbol, select the object you want to make a symbol and either drag the object to the Symbols palette or click the New Symbol button in the Symbol palette. Symbols are especially useful for designers who do their layout in Illustrator, as you can store frequently used Logos and text as a symbol for easy retrieval.
Intro to Adobe Illustrator’s Gradient Mesh tool
Ever wonder what you could do with that Gradient Mesh tool in Adobe Illustrator? It’s one of the most powerful, and yet underused tools in the program.
Here’s a great little tutorial to get you started: Magical Butterfly’s Mesh Tutorial.
Illustrator Gradient Mesh tutorial
 Life In Vector has a great tutorial on using the Gradient Mesh tool in Adobe Illustrator. It’s available on the download page, and is about a 1.3MB PDF file. You can also view some of the fantastic illustrations, like the car above, done completely in Illustrator.
Changing the default font in Illustrator CS
When you have a client that always uses the same font, do you ever get tired of having to always change the font when you start typing in Illustrator? Fortunately, you can change Illustrator’s default font. Before changing the default font in Illustrator CS, you need to create a custom startup file by editing the Normal Character Style in Illustrator’s startup files. To change the default font: 1. Quit Illustrator. 2. In the Adobe Illustrator CS/Plug-ins folder, copy the current default startup file – Adobe Illustrator Startup_CMYK or Adobe Illustrator Startup_RGB – and save it with a different name. (This creates a copy of the original startup file in case you need it again.) 3. Open one of the default startup files (Adobe Illustrator Startup_CMYK or Adobe Illustrator Startup_RGB, depending on which type of document you intend to use). 4. Choose Window > Type > Character Styles. 5. Select the Normal Character Style and choose Character Style Options from the palette pop-up menu. 6. Select Basic Character Formats and choose the desired font from the Font Family pop-up menu. 7. Click OK, and save the new file as Adobe Illustrator Startup _CMYK or Adobe Illustrator Startup_RGB in the Plug-ins folder. 8. Restart Illustrator.
Duotone support in Adobe Illustrator
Adobe brought transparency to the Illustrator world back with version 9. One of the many complaints about the poor-selling AI9 (and believe me, if you used it, you could see why nobody liked it after only 5 minutes of use!) was the inability of linked spot color EPS photos to interact with all the transparency features. In order for the Pantone colors to output correctly, you HAD to embed the photo in AI, which resulted in absolutely huge file sizes and a pretty decent wait while the file saved. If you forgot to embed the photo, AI would output it as a CMYK or RGB image, depending on what document color space you were in. Illustrator finally fixed this with version 11 (Illustrator CS). You can now link spot color EPS images into AI and not embed them – Even if you have an object with a drop shadow on top of it. This is great because you can keep a more modular workflow this way. Of course, there are very few instances where I would use a placed photo in Illustrator to begin with (at least in the advertising design business anyway). But, this is one old habit I’m happy to say I can finally break!
Zoom in/out with the spacebar in Illustrator and InDesign
This may be obvious to anyone who has used Illustrator and InDesign for a while, but not everyone has done so. When you’re working on a large file in Adobe InDesign, you can zoom in on an area by holding down the Command + Spacebar keys while using your mouse to select an area on the screen. Upon release of the mouse button, the area you selected will appear larger on the screen. Add the Option key to that and you can zoom out as well.This may be obvious to anyone who has used Illustrator and InDesign for a while, but not everyone has done so. When you’re working on a large file in Adobe InDesign, you can zoom in on an area by holding down the Command + Spacebar keys while using your mouse to select an area on the screen. Upon release of the mouse button, the area you selected will appear larger on the screen. Add the Option key to that and you can zoom out as well.
