
You finally chose a typeface that’s perfect for your next print or screen design project. Good job, but don’t break out the bubbly just yet. For many projects, one font isn’t enough to create visual interest and establish the information hierarchy. And when you have multiple typefaces, you want to be sure that they work well together.
Tagged: type
Extensis offers free Type Trends Report

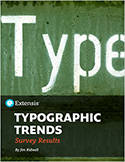 Extensis, makers of Suitcase Fusion and Universal Type Server, surveyed thousands of graphic designers, art directors and creative people from around the globe to learn what they think about current trends in typography. The Typographic Trends report is free to download.
Fonts with the sexiest ampersands

The ampersand is every typography addict’s favourite ligature, but which font has the best? Here are 30 of the best.
Who reads font licenses anyway?
By Jim Kidwell
Product Marketing Manager at Extensis
Quite a few of you, that’s who! They can be long, boring, and filled with legalese, but reading them can save you from costly missteps.
They’re font licenses, also known as the End User License Agreement (shortened to EULA). These documents cover what you can and cannot do with the fonts that you licensed. While typeface designs cannot specifically be copyrighted in the USA, the software that’s used to make them display properly on your computer can. This is why fonts are pretty much licensed like other pieces of software.
 The company that I work for, Extensis, makes the font management utilities Suitcase Fusion and Universal Type Server. During a recent webcast about Server-based Font Management, I surveyed attendees and asked them the following question:
When you purchase a font, do you read the font license?
I was happy to see that almost half of the survey group actually read them. Since the survey was of people who are specifically interested in managing their font collection using a server, I was happy to see these results. That being said, in the wider market I’m not as confident that we would see as much interest in reading the details of each font license. I would definitely like it to see that percentage even higher.
Many type foundries (those who create and sell fonts) have worked to make their EULAs simpler and easier to understand. That being said, there are still many situations where you may need to purchase an extended or modified font license.
Some of the conditions that may or may not be permitted, or where foundries may require you to purchase an extended license include:
- Embedding into a PDF
- Embedding into an distributable application – “there’s a font for that!”
- Embedding into an eBook
- Utilizing a single character or glyph prominently in a logo design
- Selling a product that consists primarily of featuring the font (such as a mug with an inscription, a shirt with a phrase on it, or magnetic letters for a fridge)
- Converting a font from one format to another
- Modifying the font in a font editor
- Using a font as a web font
These conditions vary by foundry. First step is to definitely read the EULA that came with your font. Can’t find a copy? Check with the foundry. While foundries vary in size, so you may be communicating directly with the creator of your favorite fonts.
So, if you’re already on top of this, good job!
If you’re “less than confident” about your licenses, I encourage you to take that first step today. Knowing what your rights and responsibilities are will help you create with confidence.
Once you’re started down the right path, you might want to centrally manage your fonts and font licenses. We’ve created a document at Extensis that will help you determine if and how server-based font management could fit into your team. Take a minute to check out the Server Based Font Management Best Practices Guide (Free PDF)
FontExplorer X Pro 3: complete font management for your Mac
What started with admiring the very slick icon, ended up being complete surprise to me, and a shift in my thinking about my preferred font management app of choice.
FontExplorer X Pro 3 (I’ll call it FEX from this point forward) isn’t the “mostly glitz and little guts” type of alternative application you run into when trying to replace a big-name app. FEX is stable, fast, intuitive, and actually works as advertised. After about an hour of use, I began to think “this is nice, but at some point today this thing is going to do something to tick me off.” FEX never did.

FontExplorer X Pro's main window contains exactly what you would expect in a font manager
The main window of FEX is much like any other font manager, listing your fonts and font sets in a column on the left, with a preview of fonts on the right. And like other font managers, FEX allows you to create groups of fonts you use frequently, add tags to your fonts for easy searching, get more in-depth info about your fonts, and set up custom type previews of selected fonts. Being a Suitcase Fusion user, I felt right at home in FEX. (more…)
Feed your type addiction with RSS
 Sigurdur Armannsson has put together an exhaustive list of typography-related RSS feeds over at Font.is. Every site in the list has a brief description and a link to the RSS feed. If you prefer to grab them all, he has made an OPML file available for download.
How to edit multiple type layers at a time in Photoshop
![]() If you want to change the font, color, kerning, or any other character or paragraph attributes, simply Command + Click or Shift + Click the type layers you want to edit, then adjust the settings to your liking in the Control Bar, Character or Paragraph panels. This tips works in Adobe Photoshop CS1, CS2 and CS3.
If you want to change the font, color, kerning, or any other character or paragraph attributes, simply Command + Click or Shift + Click the type layers you want to edit, then adjust the settings to your liking in the Control Bar, Character or Paragraph panels. This tips works in Adobe Photoshop CS1, CS2 and CS3.
Creating “dirty type” in Illustrator
When you’re working in Illustrator and you want a little “rougher/hand-drawn look” to your type, try converting the type to outlines then convert your stroke to an outline as well.  First, make sure your type has a stroke applied. Then select your type with the Arrow tool, go to Type>Create Outlines (or Command + Shift + O). Then, go to Object>Path>Outline Stroke. This will essentially make the stroke of the type a different object completely. Now comes the fun part. Use the Direct Select tool (the white arrow tool) to select the stroke outlines and move them however you wish. You can achieve even better effects by grabbing the bezier handles and stretching them. For even more effect, you can go to Filter>Distort>Roughen and use very small amounts in the dialog input boxes to achieve greater “hand drawn” appearance.