One of the cool new features of Adobe InDesign CS6 is the auto-size feature for text boxes. It’s useful for those of us who prefer to keep our layouts neat & tidy. But it also has another very functional feature; ensuring gradients applied to text appear the way you expect them to.
As InDesignSecrets points out: when you apply a gradient to text, the gradient is actually applied to the frame itself, it just appears to be applied to the text inside the frame. So the gradient can appear to extend beyond the text.

In the example above, I have the same black-to-green gradient applied to the text in all three text frames. But as you can see, only the bottom one shows the full gradient. That’s because the frame itself is set to auto-size to fit the text it contains. The two frames above it are larger, and the gradient adjusts to the size of the frame itself, rather than just the text.
So the moral of the story is: if you apply a gradient to text, make sure the text frame itself is sized to fit.

 Vectips has a quick tutorial showing you how to create
  VectorTuts is a great site for Illustrator users to explore. Be sure to check out the community links section as well!
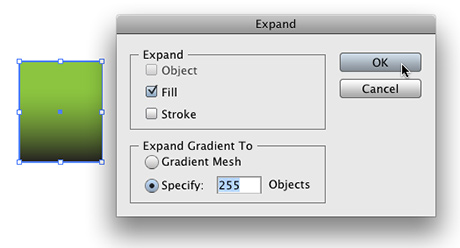
 Instead, select all the objects containing gradients (or just hit Command + A to grab everything) and go to the menu bar and select Object>Expand and hit OK. Your gradient is now converted into many objects with different shades of solid colors, rather than a single object with a gradient, so they can easily be converted to grayscale. In most cases, just hitting OK will do the job just fine. But if you find the results not to your liking, you might try adjusting the number of objects created to simulate the gradient at the bottom of the Expand dialog box first. The more objects you create, the smoother the gradient will appear when converted to individual objects. Because you have expanded the gradient to multiple objects, going back and editing the gradient is a royal pain, so be sure to save a copy of the original before you expand it.