Tutorials

Printing: Black vs. Rich Black

If you've worked in the print design business for any amount of time, you've no doubt heard the term "rich black" more than once. If you're not quite sure when or why to use it, read on for a brief explanation.

gen_rich-black.png

Because large areas of black ink tend to appear a muddy brown or charcoal gray color lacking richness and depth, printers recommend using a rich black (a mix of cyan, magenta, yellow, and black ink percentages) in large solid areas where black ink is desired.

Illustrator gradient mesh tutorial

LifeInVector has a great Adobe Illustrator Gradient Mesh tutorial available. The tutorial is a downloadable PDF/Illustrator file combo, and covers the use of the tool quite well.

tut_ai-gradient-mesh-tut.jpg

If you're looking for more, check out this list of 40 great Illustrator tutorials at Smashing Magazine.

Adding gradient strokes to type in Adobe Illustrator

tut_ai-gradient-strokes.jpg

Vectips has a quick tutorial showing you how to create gradient strokes on your type in Adobe Illustrator. This super simple technique use the Appearance panel and effects to create editable gradient strokes in Illustrator. As a bonus, you can add transparency for a very cool effect as seen above.

Creating cool 3D springs in Adobe Illustrator

In this excellent tutorial at VectorTuts, you'll learn how to easily create 3D springs in Adobe Illustrator using little more than a simple shape and the 3D Revolve Effect.

ai_3d-springs-tut.jpg

The finished results look complex and time consuming, but the actual technique really isn't at all. You may not have cause to create a spring in the near future, but the technique is quite handy to learn - you never know when you can apply it to something else you're working on.

Creating letterhead templates in Microsoft Word

If you've been in the design business for any amount of time, you've no doubt run across a client who asks you to create a letterhead template they can use on their Windows machine in MS Word. Ugh!

MS Word template tutorial

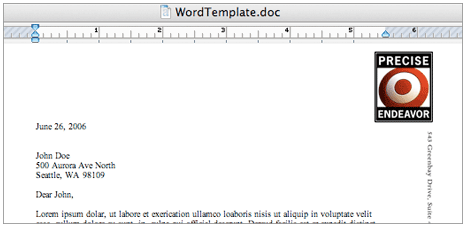
Fortunately, there is a relatively simple way to get a little control over the placement of graphics using Word's absolute position option when placing your images.

My friends over at CreativeTechs have a step-by-step tutorial to show you how to accomplish this very easy task.

Archiving emails from OSX's Mail application

OSX MailThere are lots of ways to archive old emails from OSX's Mail application for later reading. Many of them require you to work with another piece of software, some require you to "restore" an .mbox file to the proper folder - and almost all of them require you to launch Mail in order to actually read the archived email. While most archiving apps offer plenty of flexibility, they can be more trouble than they're worth if your needs are simple, and you don't have the budget for 3rd party apps. If you're looking for something a little easier with less bells and whistles, I've got a quick solution for you.

Using shapes and gradients in Adobe Illustrator

With simple shapes and gradients, this Adobe Illustrator tutorial will show you how to create an alarm clock icon. We'll be using Illustrator CS4 for this tutorial, but those of you with older versions of Illustrator should be able to follow along as well.

Shapes and Gradients tutorial for Adobe Illustrator

VectorTuts is a great site for Illustrator users to explore. Be sure to check out the community links section as well!

Creating rounded corner boxes easily with InDesign scripts

I'm not talking about making all four corners of a box rounded. That's easy to do with InDesign. I'm talking about making only a few of the corners rounded. You could draw them by hand with the Pen tool, but that's kind of time consuming. Instead, use the built-in Script Adobe provides.

  1. Start by drawing a box. Make sure you leave it selected

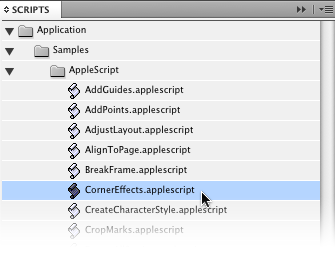
  2. Next, visit the Scripts panel in InDesign by going to Window>Automation>Scripts

  3. In the panel that comes up, you'll see a folder in the list called Applications. Open that folder. Now open the Samples folder, followed by the Applescript folder.

    id_round-corner-1.png
  4. You'll now see a long list of Applescripts you can apply to objects in your InDesign document. Scroll down to CornerEffects.Applescript and double-click it

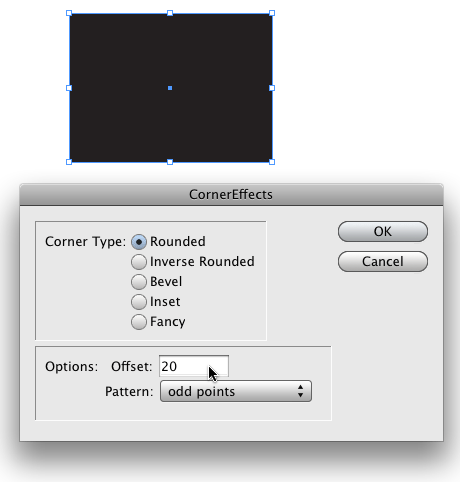
  5. In the dialog box that pops up, you're presented with several options.
    Choose the Corner Type you wish to apply by clicking one of the radio buttons, as well as typing in the size of the effect (you may have to try the script a few times to get the size you want, as there is no live preview available).
    id_round-corner-2.png

    id_round-corner-3.png

  6. Now you simply have to decide which corners you wish to apply the corner effect to. You have several options, including odd, even, first and third, second and fourth, etc.

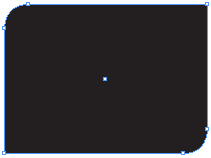
    Keep in mind that the corners of the box start at the top left-most point and run clockwise. So in the case of a simple rectangle, the first point is in the top left corner, and the fourth point is in the bottom left corner. Once you've made your adjustments, hit OK. That's it. You now have an editable box with rounded corners as you see at the right.

I like that the effect is editable after the fact. It makes the box more flexible for multiple uses, and it's much faster than drawing them by hand.

Using Automator to batch rename files

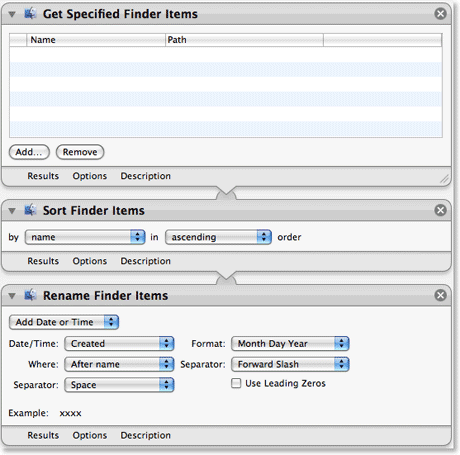
Often you might find you have a folder containing hundreds of files, and you want to rename them all. Obviously, you don't want to do this manually, it would take forever. You could download a shareware application to do the job, but that'll cost you. Luckily you can use Automator to make the process more efficient.

tut_automator-batch-rename.png

Mac OSX Tips has a quick tutorial to show you how to batch rename files using an Automator workflow, and it won't cost you a dime.

Create eye-catching text with Adobe Illustrator

Layers Magazine has posted a great little tutorial for Adobe Illustrator users, showing you one way to create eye-catching text in a comic book style.

tut_ai-layersmag-wow-text.jpg

The technique is simple and uses little more than the Free Transform tool, some strokes and the Pen tool.