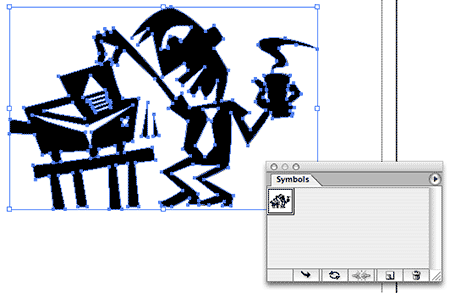
Symbols are simply stored objects created or placed in Adobe Illustrator that you can retrieve easily from the Symbol palette. This includes mesh objects, raster images, text, regular and compound paths or groups of objects. (You cannot, however, create a symbol from a linked piece of art or graphs)  To create a symbol, select the object you want to make a symbol and either drag the object to the Symbols palette or click the New Symbol button in the Symbol palette. Symbols are especially useful for designers who do their layout in Illustrator, as you can store frequently used Logos and text as a symbol for easy retrieval.
Fixing blurry text in Web graphics
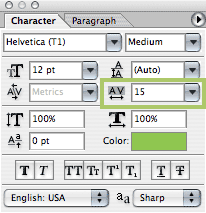
 When using small text in web graphics in Photoshop, you may notice that your text looks blurry at small point sizes (usually, anything below 12 to 14 points). Running a sharpening filter over rasterized text only serves to make it look worse. To clean up the blurry text, try increasing the tracking (kerning)amount of the text using the Character palette. By increasing the tracking amount it lowers the effects of anti-aliasing, thus making the letters appear sharper/cleaner.
Moving InDesign items to the front or back
![]() When using Adobe InDesign, you can send any item to the back of a layer by pressing Command + Shift + [. To bring the item to the front, use the ] key instead. Take the Shift key out and you’ll move the item up and down in the layer order one at a time.
When using Adobe InDesign, you can send any item to the back of a layer by pressing Command + Shift + [. To bring the item to the front, use the ] key instead. Take the Shift key out and you’ll move the item up and down in the layer order one at a time.
Sending large files via email
 If you’ve ever had to send a large file via e-mail to a printer or publication at the last minute, only to realize that either your ISP, or the ISP of the person receiving the e-mail cannot send files as large as yours, you know how frustrating it can be. You could get your own domain name and post it on your site, but that seems like overkill. You could use FTP, but your run the risk of having to spend an hour on the phone explaining to some underpaid secretary how to use FTP on her 7 year old PC – not to mention you still need a site to upload it to. Enter YouSendIt. YouSendIt is a “remailer” service, and it’s totally free. You go to their site, upload your file to THEIR server and type a custom message. YouSendIt then sends the person you want the file to go to a simple text message with a link to the actual file that they can download via the Web. Since pretty much everyone on the planet is capable of clicking a link, it couldn’t be simpler. The file remains available for download for a short time, so the end user isn’t forced to download it immediately, though you don’t want them to wait too long, because the files are deleted after a set amount of time.
Cool Web site: Montage-a-Google
 Montage-a-Google is one of those sites that isn’t immediately apparent how fun & useful it can be, but that should change fairly quick. Of course you could do this sort of thing manually, this Web-based application written by Grant Robinson makes it a bit more fun, and a little less work. As you can see by the sample above, I used the keyword “bikini” – a favorite subject matter of mine! I can think of a few projects I could have used this for, simply for a background image. Just remember, you don’t own the images used in the montage, it’s perfectly legal to use the images for personal use, but you might want to avoid using them in an ad for a national client!
Align guides to ruler tick-marks in Photoshop
Ever have difficulty getting a guide to line up with a tick mark on the ruler while working in Photoshop? Or see that it appears to line up, only to find out when you zoom in that it really doesn’t? Fortunately there’s an easy way to do what you want. Hold the Shift key down while you drag a guide to exactly the tick mark you wish. The guide will “snap” to each tick mark on the ruler.
Snap Photoshop palettes to screen edge
Snap your Photoshop CS & CS2 palettes to the nearest screen edge by Shift-dragging them or Shift-clicking on their titlebars. This seems like a silly tip, but it drives me nuts to see palettes that aren’t perfectly aligned!
InDesign font selection shortcut
Getting control of the Font menu can be a daunting task if you have a lot of fonts activated. Adobe has made their apps somewhat easy in that they group fonts by family, but it can still be a long list to scroll through. When you’re working in Adobe InDesign, you can click in the font field in either the Character palette or Control bar and type a letter of the font you’re looking for, which will automatically select the first font using that letter. So if you type the letter “T” you will most likely end up at a font named Tahoma. Once you have the first font by that letter in the menu, you can click the font popup menu and select the actual font you want. Another way is to simply start typing the font you are looking for and InDesign will select the font as you type.
Intro to Adobe Illustrator’s Gradient Mesh tool
Ever wonder what you could do with that Gradient Mesh tool in Adobe Illustrator? It’s one of the most powerful, and yet underused tools in the program.
Here’s a great little tutorial to get you started: Magical Butterfly’s Mesh Tutorial.
Selecting objects on an InDesign layer
Did you know that you can select all the objects on a specific layer on the active page by Option-clicking the layer’s name in the Layer palette?
