 Apple | Mac
Email archiving in PDF format for the Mac
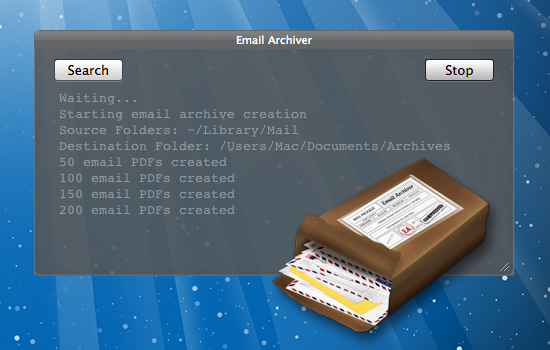
There are plenty of reasons for wanting to permanently archive your emails, not the least of which is making sure you have a record of agreements you’ve made with clients. Whatever your reason for wanting to archive your emails, there is a simple solution for Mac users that ensures future accessibility.
Email Archiver creates a PDF file of each and every email in Mac OS X’s Mail application. The advantage of a PDF archive is that they are compatible with so many applications, thus making it future proof. The app simply scans all (or some) of your mailboxes and folders in Mail and creates a PDF of the mail, including a full email header for searching purposes, and creates PDFs of each email in hierarchical folders in the Finder location of your choice.
Email Archiver normally costs $9.99, but is free right now on the Mac App Store.

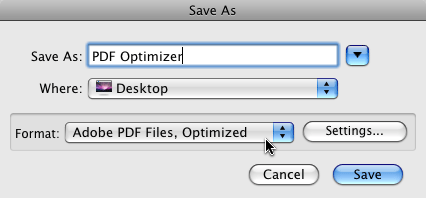 Clicking the Settings button offers you complete control over how your PDF files get optimized. The first thing to do is figure out what’s taking up so much space in the file. You do this by clicking the Audit space usage button in the upper right corner of the PDF Optimizer dialog box. A window will open offering you a breakdown of what’s eating up all the space (see image below).
 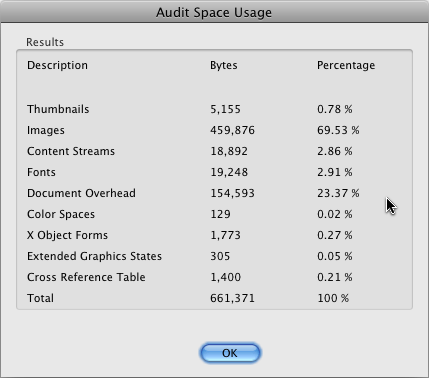 As you can see in the image above, the images in my test PDF file are what’s taking up the most space, so that’s where I need to focus my attention. Close the Audit window to return to the PDF Optimize dialog box. In the panel list on the left side of the PDF Optimizer you can choose which areas of the PDF file you wish to work with. In the case of my test file, I chose Images. As you can see in the screenshot below, you can downsample your images, select the quality settings, and more.
 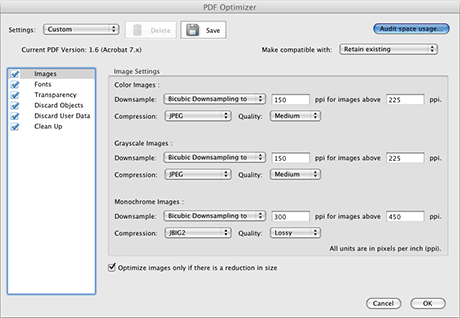 This as opposed to older versions of Acrobat where the program just decided for you to reduce everything to the bare minimum. The new PDF Optimizer gives YOU the control and the choice. Selecting other source items such as Transparency, Discard Objects, Fonts, and Clean Up are also available. I recommend you take a look at all of these to see where you might be able to save a few “k” in file size. It all adds up. I also recommend you don’t overwrite the original PDF file, just in case you’re not happy with the results. If you wish to see the PDF Optimizer in action, visit the
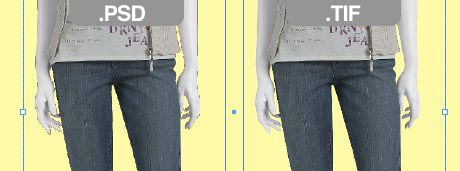 If you place a PSD file with a transparent background into Adobe InDesign and export it as a high-res PDF, you may notice that the edges of your placed image look horrible. There’s usually a black & white halo around the edges of the transparent PSD (see the image above for example). You won’t see them on a placed TIF file, and they generally don’t print anyway, but they’re annoying nonetheless. Fortunately, Bob Levine at InDesignSecrets has finally spilled the beans on what the problem is, and how to fix it. In most all cases, it’s as simple as turning off the Smooth Images feature in Acrobat. Read
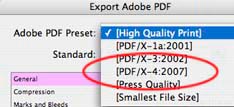 One of the many new additions to InDesign CS3 is the PDF/X-4 format in the export dialog box. There are several PDF formats, each with their own specific uses in the industry, and the latest version has it’s particular strong points as well. Steve Werner at InDesignSecrets.com has a great introductory